Ceiling Light Reflectance: Match the Data to the Metal Finish
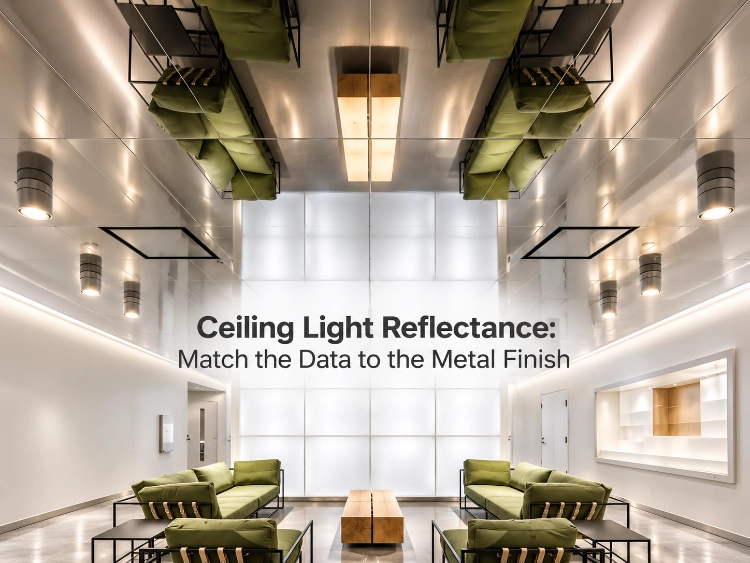
For architects specifying light-reflecting tiles, the first choice is the kind of reflection required. Use a diffuse reflective coating for a ceiling that returns light throughout the room. Use a mirror finish for a reflected image. Both can appear bright, but they perform different optical tasks; the chosen finish must remain identifiable when the tiles are ordered.
TUODELI offers diffuse reflectance of more than 90% at the reflective coating surface. We keep that capability tied to the coating: the colour, plain or perforated face and backing define the tile configuration the lighting team is assessing. A ceiling light reflectance input needs that surface identity to be useful.
The lighting task determines which metal finish belongs overhead
Diffuse reflection and mirror reflection solve different problems
When part of a luminaire’s output is directed upward, the finish overhead determines what happens at the ceiling: light is absorbed there or reflected back. That reflected contribution joins the light occupants receive directly from luminaires. Appearance and lighting are consequently two reasons to choose the ceiling finish carefully.
A mirror forms a directional image, while diffuse reflection returns light over directions. We would start with our reflective metal ceiling tiles for a design requiring a broadly bright ceiling plane. Assess the diffuse reflectance of that coating to make the choice; judging the sharpness of an image would be assessing a different property.
A mirror tile ceiling serves a reflective appearance. Review the luminaire positions and viewing directions rather than carrying a diffuse-ceiling assumption into its calculation. A feature area may need a reflected image while the main ceiling needs to return light more broadly.
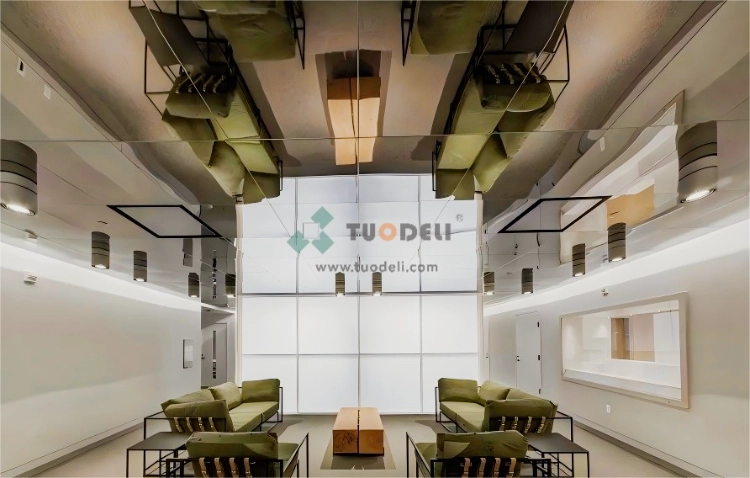
Glare, desk illuminance and energy use depend on the luminaires, room geometry and other surfaces too. High ceiling tile light reflectance provides one surface property for the lighting designer’s assessment, establishing none of those room outcomes by itself.
A white finish still needs a defined optical specification
A white colour reference settles colour, but texture and reflection also matter to the lighting model. Separately approved samples and reflectance inputs must describe the same finish.
We can supply tile finishes in powder coating, spray paint, roller coating, anodized coating, wood and stone looks, or wooden PVC laminated coating. Their selection belongs with the interior design. The capability discussed here belongs specifically to the reflective coating, so keep its diffuse-reflectance value with that finish instead of applying it across the decorative range.
Set the reflective finish requirement first where diffuse light return matters. Darker or patterned finishes can suit other architectural intentions, with lighting assessed for those surfaces. Raising assumed reflectance to retain an earlier result would disconnect the calculation from the purchased finish.
Review substitutions where the lighting design relies on reflectance. A matching colour name cannot establish that an optical value transfers between finishes.
Perforation and backing change the surface that lighting sees
The coating value belongs to the coated face
With our plain tile, the face inside the edges is continuous metal. With our perforated tile, the viewed surface also includes openings and the backing seen through them. Coating data continues to describe the coated surface in either case. Applying that coating to a perforated face does not turn its value into data for the whole viewed configuration.
What is the lighting designer being given: a property of the coating, or a value for the intended finished panel? Name that scope in the schedule and identify the sample accordingly. The evidence can then be used for the surface it describes, with no unspoken transfer from a plain sample to a perforated order.
Each type of information below resolves a particular part of the choice.
Information being considered | Decision it supports | What remains to be coordinated |
Reflective coating surface data | Selection of a finish intended to return diffuse light | The chosen colour, face and product configuration |
A sample of the intended perforated tile | Appearance of the metal, openings and backing together | The optical input appropriate to that configuration |
A room lighting calculation | Assessment of the selected surfaces with the lighting arrangement | Consistency between model inputs and the purchased ceiling |
These records serve different responsibilities. A sample makes appearance available for review, where a coating figure alone cannot. The room calculation addresses the lighting arrangement and surfaces together, beyond what either the figure or the sample can establish.
Acoustic choices have to share the same panel reference
Sound can pass through the perforations to acoustic material behind the metal. We offer acoustic tissue or glass fibre wool with perforated tile configurations for that purpose. Retaining the metal finish and addressing the acoustic brief are therefore compatible choices, provided the proposed face and backing are coordinated with the appearance and lighting requirements.
Include the backing when reviewing the perforated panel sample, because the openings can leave it visible. A metal-colour approval alone leaves this appearance question unresolved. Although acoustics may be the reason for the backing, review what it looks like together with the face.
We offer plain and perforated tile finishes within this range. If perforation is required by the acoustic design, keep the required construction and establish the lighting input for that configuration. If no acoustically active face is needed, assess the plain reflective tile as a continuous surface. Neither route assigns a universal acoustic result to the finish.
Use one tile reference for the acoustic schedule, sample label and finish schedule. It should identify the proposed face and backing in each. Separate disciplinary approvals are workable when they still lead to one assembly on the order.
The approved optical configuration must survive procurement
The lighting model needs the same finish as the order
The surface described in a reflectance input needs to be the surface purchased. A generic metal-tile note on a drawing leaves that identity open: a later finish choice could differ from the one the lighting model assessed. Carry the description from the designer’s schedule into the purchase specification.
Use a finish reference to connect the reflected ceiling plan, panel schedule and sample approval. Under that reference, retain the colour and finish, face treatment and relevant backing along with the optical evidence. The order can then identify our selected tile configuration without becoming a promise about the room’s completed lighting.
A mirror feature and a reflective ceiling field can form one architectural composition while remaining different surfaces in the lighting design. Assign the input by zone. The lighting designer should assess the selected surfaces, including any proposed averaging, so that the calculation retains the finish choices rather than concealing them.
A physical sample closes appearance questions that a value leaves open
After accepting a reflectance number, the team still needs to decide on appearance. A physical sample exposes the colour, texture, reflections and perforations to review. The numerical input has the separate purpose of describing returned light.
For the sample review, use the lighting direction and viewing relationship that the design calls for. Review the backing with a perforated face and the reflected image with a mirror feature. This gives an appearance decision, not a laboratory measurement or an assessment of whole-room compliance.
Associate the accepted sample with the specified finish. If the coating or face changes later, identify exactly what has changed for the relevant designer to review. The change determines which optical and appearance assessments need revisiting, without assuming that every substitution must be unsuitable.
The order describes the accepted assembly rather than a colour alone
An order based on the accepted configuration preserves the design choice. Its line item identifies the tile, dimensions, material, finish and colour, face treatment, backing requirement and quantity. Keep the lighting input and supporting evidence under that same reference, including when a separate consultant holds them.
A defined configuration lets us quote the selected construction and lets the project team compare that quotation with its approval. For any proposed alternative, identify what changes in the configuration. That directs the change to the discipline responsible for assessing it.
Conclusion
The useful purchase endpoint is an accepted surface configuration that agrees with the lighting input. Our reflective coating provides the starting finish option; keeping its face and backing coordinated preserves that choice in the order. For a matched proposal, send the tile finish schedule with the reflected ceiling plan, colour reference, plain or perforated face, backing requirement, design reflectance input and quantities.
FAQs
Q1: Does a white colour reference establish the ceiling's light reflectance value?
A1: The colour reference settles colour. Use optical evidence for the selected finish to establish the reflectance input, and retain it under the tile reference shared by the sample approval and order.
Q2: Can a mirror ceiling replace a diffuse reflective ceiling in the lighting design?
A2: Have the intended mirror surface assessed. Its reflected-image effect comes from a different distribution of reflected light, so it needs its own assessment instead of inheriting a diffuse-reflection assumption.
Other News